Wednesday, 30 January 2013

Boudoir, Beauty and Bouncy Hair


Here is a really easy step by step look for some fab volume and gorgeous bouncy curls.

What you will need:
-Heated rollers
-Curling tongs/wand
-Pin curl clips
-Kirby grips
-Back combing brush
-Volumising hair insert
-Hair spray

1. Firstly section and roll the top half of your hair into the largest heated rollers you have, lightly spraying with hair spray as you go.

2. Take sections of the lower half of your hair and curl it with your curling tong.

3. Remove the tong and recurl the hair using your fingers, then clip in place with a pin curl clip. do this for the whole bottom half of your hair then leave your hair to cool down for about 30 mins (longer if you like).

4. Remove all of the clips and heated rollers.  Back comb the top section of your hair and leave sitting forward.

5. Insert the volumising hair insert underneath the backcombed hair and secure according to instructions on the packet.

6. Brush the backcombed hair back over volumising insert and smooth over. Gather the brushed over hair, twist it slightly then secure with a few kirby grips.

7. Run your fingers through your curls to loosen and secure with hair spray.


I styled my gorgeous friend and model Nicole Abbots hair like this for a boudoir shot with Kirsty Brown at Memento studios. Kirsty also decided to film the session, so if you are considering a boudoir shoot and want to know what it entails then have a watch.


Have you ever considered a boudoir shoot? Did you like or try the hair tutorial?


Leave me a comment with your thoughts :)

Jillian Elizabeth

Monday, 28 January 2013

Dotty Heart Nails


Well its a few weeks till valentines day so I thought Id give you some inspiration ahead of time!!!!

This is such a simple but cute nail art look to try, anyone can do it!!!

1. You will need:
base coat
top coat
white nail polish
red nail polish
nail file
fine brush
cuticle stick.

2. File nails to desired shape, soak for a few mins in warm water and gently push cuticles back.

3. Apply base coat

4. Apply two coats of white nail polish.

5. Dip your thin brush in the red polish and use it to paint dots on all your nails except your ring finger.

6.

Friday, 25 January 2013

Let The Good Times Roll!!!!

Well about 4 weeks ago I nipped into lush to buy a little gift for a friend. Whilst paying at the desk I started chatting about exfoliants with the sales woman and how I can never find a facial product that is abrasive enough to exfoliate my super dry skin however gentle enough to use every day. She recommended one of their products and with one sniff I was hooked!!!

I have been using Let The Good Times Roll daily for 4 weeks now and it is amazing!!! My skin is so soft and the smell is AMAZING. It smells like caramel or toffee biscuits and is just to die for. It has a creamy and slightly abrasive texture that feels amazing on your face. It removes all of my make-up along with dry skin and has left my face feeling super soft!!!!


So simple to use, all you need to do is take a small amount in your hands with warm water and massage onto your skin with nice warm water then rinse off. I use it in the shower every day after using all of my other lush products!!!

This product is £5.95 for 100g and can be bought in store or online here

What do you guys think? have you tried this product or any other lush products? Did you love it as much as I do? Leave me a comment with your thought!!1


Wednesday, 23 January 2013

Some Hair And Beauty With A Little Cutie

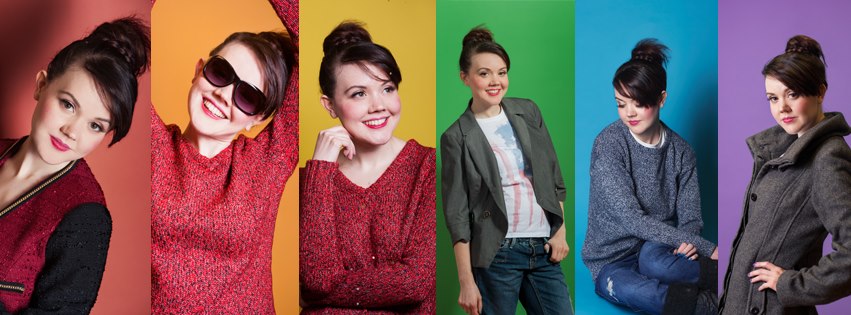
Today I had a fab little shoot with my friend Kirsty Brown of Memento studio to test out her new coloured backdrops :) Our gorgeous friend and model Nicole Abbot stepped in to help us out and all I can say is WOW. I am so happy with the pictures!!!

Since working as a make-up artist for the Matrix hair show, I have really got into hair styling and trying out new things so I thought I'd do a quick blog on the hair I did for Nicole today :) I am also practicing using my new camera so I have been getting snappy :P


1 Brush hair through.

2 Tie hair in a high pony tail.

3 Take a small section of the hair and braid it into a pleat.

4 Wrap the remainder of the hair around the pleat to form a bun and secure with kirby grips.

5 Next Wrap the pleat around the bun and secure with Kirby grips. Spray lightly with hair spray.

6 Admire your gorgeous new up-do.


Hope you all like it :)

Let me know what you think.

Here is Kirstys professional picture showing her new backdrops :)


For more examples of Nicole's modeling work check her out here

For more examples of Kirsty's photography check her out here also to hire her studio in Dundee have a look here

Friday, 11 January 2013

Review of Olay Daily Facial Cloths Sensitive


Ok this is the miracle face wipe!!! literally the quickest and easiest way to remove make-up with just one wipe!!! And I picked up a box in Asda for the bargain price of £1.50

you get 30 individual cloths in the pack. All you need to do is quickly hold one under a warm tap and massage gently with your hands and it will lather up. wipe the cloth all over your face and massage in to remove make-up and dirt. I then rinsed the cloth again and wiped it over my face to remove all of the residue. It was AMAZING!!!! It removed all of my make-up including waterproof mascara.

I also used this to give myself an entire facial, including removing a face mask and it held up :)

Have you tried these before or do you have annother fave face wipe?

Leave a comment and let me know :)

Thursday, 20 December 2012

How to/ Review on nail Constilations


1. MUA Nail Constilations
2. Shellac base coat and top oat
3. 2 Matching shellac colours
4. Apply Base coat and cure in lamp
5. Apply 1st coat of Shellac colour on alternative nails and cure in lamp
6. Apply second coat of shellac colours, then hold your hand over a bowl while you pour the constilations onto your nails. Press them firmly onto your nails then cure in lamp.
7. After curing
8. After Curing
9. I applied and cured 2 coats of top coat to get a smoother finnish however this seemed to discolour the constilations so sad me :(

You can of course achieve this look with nail polish, I just used shellac as it lasts longer!!!

Have you ever tried nail constilation? What do you think?

Let me know

Jill

Monday, 19 November 2012

Isolated Heros and Embellished Eyebrows!!!!


Hi readers,

Recently I have been working with Samantha and her amazing team at the Luxury Unisex Street wear label Isolated Heroes. This label is unlike any other, the colours and prints are amazing, bold, bright and vivid and every new piece I see I fall in love with!!

You can view the amazing collection at the ASOS Shop  HERE

Today I am going to show you how to make some gorgeous stick on embellished eyebrows that I invented for using in the Isolated Heroes Fashion Film. I’m sure other people have made similar eyebrows, but I yet to see them.

After meeting Sam and browsing through her pervious looks I knew exactly what she wanted make-up wise for the film. Big, bold and visually exciting, just like the amazing clothes she has designed. This is when I thought embellished eyebrows would look amazing, however due to previous experience I knew this could be fiddly and time consuming. I had to come up with something I could make before hand and stick on in seconds, here follows nights of me sitting up till midnight making pairs upon pairs of these.


1 get some light mesh material and a laundry basin
2 Use some sectioning clips to clip the material to the basin
3 Find a selection of bindis, sequins, diamantes and anything sparkly you want
4 Use tweezers to glue each embellishment on (I used PVA but next time I will be using super glue)
5 make lots of different kinds
6 Use eyelash glue to stick them on your gorgeous model!!!!

Now the first time I wore these they came off no bother with cleanser and baby oil, however the second time I wasn’t so careful and ended up pulling out bits of my eyebrows, so I suggest soaping the eyebrows down first then gluing them on!!!


I used these eyebrows whilst doing make up for the Isolated Heroes Fashion Film, Rave and Film Launch party and they went down a storm.

To watch the AMAZING fashion Film click HERE

Here are some pictures from all events. All clothing is from Isolated Heroes :D


Let me know what you all think, have you ever tried similar eyebrows and do you think this little tip will be useful?

Have you got any Isolated Heroes Clothes and do you love them?

Love you all

Jillian Elizabeth

Special thanks to the amazing Samantha McEwan at Isolated Heroes and a million thanks to all the models etc involved. Full credits are on my facebook page!!